Color Channel Manipulation with libvips
Standard Color Channels
Let's take a high-level look at the normal color channels in an image. Under most typical situations we think about color as being stored in three or four color channels, the most common being red, green, blue, and optionally an alpha or transparency channel. A single channel to represent greyscale or a two channel image to represent greyscale with transparency is also reasonably common.
In all cases it's useful to always think about channels as independent greyscale images that our rendering application treats as the intensity level of some particular color or attribute.
The common case scenario of wanting to store either RGB, RGBA, or Greyscale is so useful that many file formats bake this assumption directly into their specifications.
What's key is that the file format specification provides a contract so that all applications that support a particular format can agree around how to encode and render some raw data into an image.
Playing With Channels
Decomposition
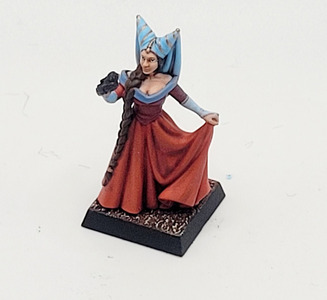
Let's start by decomposing an image into channels.


require 'vips'

source_file = Vips::Image.new_from_file('lady.jpg')
source_file.bandsplit.each_with_index do |channel, index|
  channel.write_to_file("lady_#{'RGB'[index]}.jpg")
end
Recomposition
We can now recombine channels in various orders to get...interesting results. Keep in mind that our red channel is much more intense than our other two channels so it will emphasize whichever channel we place it in.


require 'vips'

lady_r = Vips::Image.new_from_file('lady_R.jpg')
lady_g = Vips::Image.new_from_file('lady_G.jpg')
lady_b = Vips::Image.new_from_file('lady_B.jpg')

lady_r.bandjoin([lady_g, lady_b]).copy(interpretation: :srgb).write_to_file('lady_rebuilt.jpg')
lady_g.bandjoin([lady_r, lady_b]).copy(interpretation: :srgb).write_to_file('lady_remixed.jpg')
lady_g.bandjoin([lady_b, lady_r]).copy(interpretation: :srgb).write_to_file('lady_remixed2.jpg')
Extra Color Channels
Why should we care about additional color channels? Some applications, like Photoshop and Gimp, use the first 3-4 channels as a typical RGB/RGBA preview and give you the option of storing individually colored spot channels, where each channel is given a specific color and the channel is used to represent the intensity of that color present in each pixel. It's quite useful for print applications where specific ink colors are applied to each channel.
A key point here is that this use of extra channels is not specified by any particular standard, it is specific to a particular application's whims. These additional channels are therefore useful if you own both the encoding and rendering of the files and you have a specific usecase where encoding additional per-pixel data is somehow useful. Provided the pixel dimensions of the images are the same there's absolutely nothing stopping you from hiding a second image in channels 5 through 9 while channels 1-4 encode an image as normal.
Keep in mind that many image formats do not support non-standard color channels. TIFF files support over four channels so are a great choice if you need to store this kind of image. Some applications, like ImageMagick, will throw out your non-standard channels during their read/write flow, so be careful with these images.
Stack 'em up
Let's make an image that has the same dimensions as our lady image.
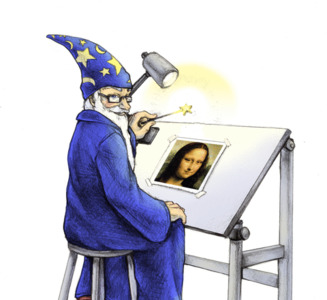
convert wizard: -resize 327x300^ -crop 327x300+0+25 wizard.jpgNow let's hide our wizard behind the image of the lady.
require 'vips'

lady_image = Vips::Image.new_from_file('lady.jpg')
wizard_image = Vips::Image.new_from_file('wizard_cropped.jpg')

lady_image = lady_image.bandjoin_const(255) # Add an alpha channel

lady_image.bandjoin(wizard_image).write_to_file('lady_secret_wizard.tiff')

Most image viewers will just show the lady, but if you open this image in Gimp or Photoshop you will see the wizard in the "channels" menu.
Unstack 'em
Now let's recover our secret wizard image.
require 'vips'

lady_image = Vips::Image.new_from_file('lady_secret_wizard.tiff')

# Starting at the 5th band (0 indexed), extract all but the first 4 channels.
wizard_image = lady_image.extract_band(4, n: lady_image.bands - 4)
wizard_image.write_to_file('revealed.jpg')