Alpha Blending with libvips
Essentially the idea is that you can use any greyscale image as a mask for an arbitrary color to overlay semi-transparent colored images on top of each other...you can visualize it a little bit like silk screen printing. It's worth noting that this is a form of alpha compositing.
We'll take a channel from each of these images, use it as an alpha mask for a color and then combine them into what will no doubt be a weird looking image.
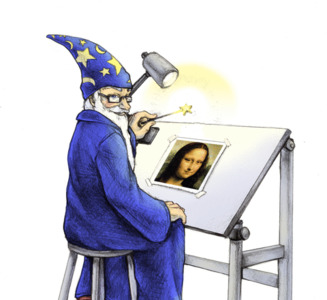
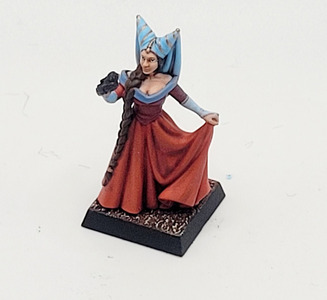
We start by pulling a single channel from our wizard and lady images. These get inverted so that darker regions in the original image are treated as more opaque. Then we use these as transaparency channels on solid color images. The colors in this case are the colors of our silk screen "ink". The resulting channels look like this:


require 'vips'

def build_solid_color(image, color)
  image.copy(interpretation: :srgb).new_from_image(color)
end

lady_image = Vips::Image.new_from_file('lady.jpg')
wizard_image = Vips::Image.new_from_file('wizard_cropped.jpg')

build_solid_color(background, [200, 200, 255]).bandjoin(wizard_image.extract_band(0).invert).write_to_file('wizard_channel.jpg')
build_solid_color(background, [100, 100, 0]).bandjoin(lady_image.extract_band(0).invert).write_to_file('lady_channel.jpg')
Once we've got our channels assembled, we build a solid white background and overlay our images on top of it.
For the sake of visualizing properly, let's individually blend those channels over white.


require 'vips'

def build_solid_color(image, color)
  image.copy(interpretation: :srgb).new_from_image(color)
end

lady_image = Vips::Image.new_from_file('lady.jpg')
wizard_image = Vips::Image.new_from_file('wizard_cropped.jpg')

wizard_channel = build_solid_color(background, [200, 200, 255]).bandjoin(wizard_image.extract_band(0).invert)
lady_channel   = build_solid_color(background, [100, 100, 0]).bandjoin(lady_image.extract_band(0).invert)

background = build_solid_color(lady_image, [255, 255, 255])

background.composite([wizard_channel], :over, compositing_space: :scrgb).flatten.write_to_file('wizard_background.jpg')
background.composite([wizard_channel], :over, compositing_space: :scrgb).flatten.write_to_file('lady_background.jpg')
...and finally, let's overlay them on each other.

Notice how the resulting image features color blending between the two images.
require 'vips'

def build_solid_color(image, color)
  image.copy(interpretation: :srgb).new_from_image(color)
end

lady_image = Vips::Image.new_from_file('lady.jpg')
wizard_image = Vips::Image.new_from_file('wizard_cropped.jpg')

wizard_channel = build_solid_color(background, [200, 200, 255]).bandjoin(wizard_image.extract_band(0).invert)
lady_channel   = build_solid_color(background, [100, 100, 0]).bandjoin(lady_image.extract_band(0).invert)

background = build_solid_color(lady_image, [255, 255, 255])

background.composite([wizard_channel, lady_channel], :over, compositing_space: :scrgb).flatten.write_to_file('blended.jpg')
:over blend mode is used to simulate overlapping semi-transparent sheets on a projector.
:scrgb is used as our compositing space because it is a linear RGB colorspace. Always blend in a linear space to get even color mixing.
Any number of input images and colors should work with this technique. Our image choices in this case were arbitrary, but you can use this technique to emulate Photoshop spot color channels.
Keep in mind that when performing operations where colors blend, the overlaying order matters. Observe the difference when we reverse our overlay order.
